Thursday, April 22, 2010

French Cupcakes or Bouchees Chocolat au Yaourt


So I kinda have this thing with Paris. I can honestly tell you that I've been in love with Paris for more than half my life. Ever since 6th grade when Ms. BlahBlah gave us our annual country project. I don't remember exactly how it was done. I think we drew for position and then got to pick our country. All I know is that I got France and it was then my love affair with all thing French began.

In high school my friends convinced me to take Latin and I eagerly agreed as a) I wanted to hang out with my friends and b) thought I was going to be a lawyer and Latin seem like a good idea. In college when I had to pick a language I naturally went with Francais. Je voulais français! A couple years later and I could only parle un peu
français. Then I came across a book, a wonderful book, a gift from the gods. I began reading The Sweet Life In Paris by David Lebovitz and I fell in love again.

The Sweet Life In Paris is a great book. Even if you are only a casual reader I would recommend it 100%. David weaves recipes and stories together in a magical way. And the recipes, oh wow, the recipes. If nothing else, oh the recipes- they are très excellent!


Bouchees Chocolat au Yagourt (Chocolate Cupcakes)
by David Lebovitz, The Sweet Life in Paris

7 oz Semi-sweet chocolate chips (or chopped)
1/2 cup vegetable oil
1/2 cup Greek yogurt (or plain whole-milk if you prefer)
1 cup sugar
3 large eggs, at room temperature
1 teaspoon vanilla extract
1/2 teaspoon almond extract
1 1/2 cups all purpose flour
1 1/2 teaspoon baking powder
1/2 teaspoon coarse salt

Preheat oven to 350 F. Grease a 12 cup muffin pan. In a double broiler melt the chocolate with 1/4 c of the oil until smooth. In another bowl, mix the remaining 1/4 cup oil with the yogurt, sugar, eggs, vanilla and almond extract. In a larger bowl combine the flour, baking soda, and salt, whisking to combine.

Make a well in the center of the flour mixture and pour in the yogurt mixture. Stir a couple of times and add the chocolate, stirring just until combines. Pour batter into the muffin pan and bake for 25 minutes. Remove from oven and cool (though I can never wait until they are cool, I dare you to try).


Note: No matter how healthy you want to be, do not substitute apple sauce for the oil. The first time I made these with Kenz we did just that and these cupcakes are about 1000x better with oil. Trust me.

Friday, April 16, 2010

A celebration of friends and springtime


Dinner parties, my specialty. No really I love to have friends over for dinner, to each delicious foods and to drink wine. So a few weekends ago (sorry this is a late post), I had my two bestest (is that a word?) friends over for dinner and a movie. We watched The Time Travelers Wife (such a beautiful story).

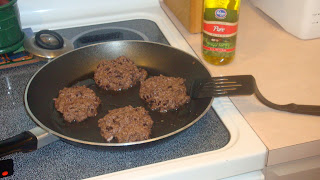
We decided to celebrate the start of spring and eventually summer. So our entree of the night was black bean burgers, Molly's potato salad (see previous blog) and a spring salad. I love black bean burgers (I am the vegetarian in the title of the blog), but I have never made them before. So I decided I was up for the challenge. So I set my sights on to The Food Network and found an easy, yet delicious recipe.

I am going to be honest, this was a delicious burger.
Happy Cooking :)

Food Networks Black Bean Burgers

Ingredients

1/2 medium yellow onion, roughly chopped

1 tablespoon chopped garlic

2 (15-ounce) cans black beans, rinsed and drain

d, divided

2 tablespoons freshly chopped cilantro leaves

2 teaspoons freshly chopped parsley leaves

1 egg

1/2 teaspoon red pepper flakes

1/2 cup bread crumbs

Salt and fresh ground black pepper

4 hamburger rolls

Optional Toppings:

1 tomato, sliced

4 small Romaine lettuce leaves, or any other type you have on hand

1/4 cup ketchup

Directions

Heat a grill or grill pan over medium-low heat

In a food processor, pulse onion and garlic until finely chopped. Add 1 can black beans, cilantro, parsley, egg, and red pepper flakes and pulse to combine.

Transfer mixture to a large mixing bowl, add the remaining can of black beans and the bread crumbs. Season with salt and pepper, to taste, and mix until well combined

Reserve 1/3 of the black bean mixture for Round 2 Recipe. Divide remaining

mixture into 4 portions and form into patties. Place on hot oiled grill over medium-low heat and cook about 6 minutes a side or until heated through. Toast hamburger buns on a grill. Place a burger on the bottom of each bun. Top with lettuce, tomato and ketchup. Cover the burgers with the top of the bun and serve.

Sorry my pictures are out of order, I am still in the learning process of how you use this!!!

Sunday, March 14, 2010

Molly's Potato Salad- Yum, Yum!

Have I ever told you about how I developed my love of baking or my obsession with baking? It's all in the interpretation. One day back in 2006 I was perusing the Internet and i came across a blog. In typically me fashion I developed an almost unhealthy obsession with this one blog that i read constantly, my blog reading slowly dwindled until Then by luck out of luck I stumbled upon Orangette and it changed everything. After reading an entry about Baked Pasta I feel in love and each week I would eagerly await a new post and head immediately to the kitchen to whip up whatever Molly was blogging about. (Did I mention its Molly who authors the blog, that would be helpful information eh?) Fast forward a year and a half and Molly publishes a memoir style cookbook. Needless to say I immediately ran out and purchased it, read it as quickly as possible and began cooking.

The very first recipe in A Homemade Life is for potato salad. Now normally I'm not a big potato salad kinda girl, drop me into a spring time picnic and I'll eat it but I'm not going to declare my undying love. I'm a very picky eater and I prefer potato salads that aren't super mustardy. I passed over the recipe for Burg's Potato Salad until last spring when it started to warm up and I had the strongest craving for potato salad. I called picked up some hamburger, called my roommate Laura and got started. I've been obsessed with this potato salad ever since. For a good three months last super I would make it every Tuesday night and bring it with me when I drove out to see my parents on Wednesday nights.

As soon as it began to warm up a couple weeks ago I decided that I absolutely had to make Burg's Potato Salad. A dinner party was in the works and when hamburgers (or black bean veggie burgers as it was) became the main fair I decided to make potato salad asap. Needless to say this potato salad is practically life changing. It takes considerably more time to make then buying a container of that nasty stuff they make at the store but it is much, much better. And it tastes considerably better on the second day after the flavors have some time to blend. Get cooking kiddies, you're gonna love this.

Burg's Potato Salad

from A Homemade Life by Molly Wizenberg


2 pounds of red potatoes
4 large eggs
8 scallions (white and pale green parts only) thinly sliced
1/4 tsp salt
3/4 c mayonnaise
4 tbsp Ranch dressing
2 tbsp dill, finely chopped

Put the potatoes in a large pan and add cold water to cover by 1 inch. Add a dash salt, and bring to a boil over medium-high heat. Reduce the heat to maintain a gentle simmer and cook, until the potatoes are tender, about 15 minutes. Drain them and rinse with cold water. Set them aside to cool. (I normally put them in the fridge to speed things up, but I'm not a very patient person either). When the potatoes are cool, cut them into 1 inch chunks and put them into a large bowl.

While the potatoes are cooking plane the eggs in a small saucepan and add cold water to cover. Now listen carefully and trust Molly completely. Bring eggs to a boil over medium-high heat. When the water begins to boil remove the pan from heat, cover it and let the eggs sit it the water for exactly 12 minutes (seems anal retentive but trust Molly, trust!) Immediately rinse the eggs in cold water. When they are cool peel them chop coarsely and add to the potatoes. Add the scallions and salt, then mix together.

In a small bowl combine the ranch, mayonnaise and dill. Pour the dressing over the potatoes and mix coating equally. You may wanna add some salt. Cover and refrigerate overnight. Enjoy!

Thursday, February 18, 2010

Fortune Cookies


Now before we get started I will warn you, our fortune cookies did not turn out- they looked fabulous but well... the taste part was lacking. The recipe was suppose to make 24 and we ended up with 9- I'm gonna call that Problem A. Problem B- these things seemed relatively healthy- I mean, how can you succeed when you use egg whites- I think the kitchen gods were against us. Or maybe it's my obvious lack of Chinesseness, maybe we'll try again later, maybe I hate writing fortunes and don't plan on repeating this ever again, or maybe you'll make these despite my obvious bias against them (sorry Kenz). Either way it was fun and that's why I bake (I got over that baking for boys thing months ago, such an obvious fail). I bake to hang out with my girl friends, beat the shit out of some eggs and consume large quantities of chocolate. And I achieved all so I'm gonna call it a success.

If you so choose to make fortune cookies you can be all cute and write little personalized notes and dip them in chocolate and add sprinkles and pretty much full fill every ten year-olds dream. The cookies are super easy (but then again mine were a total flop, haha). Make sure you give yourself time to let the batter chill for an hour in the fridge before you get started or you may consume half a bag of Sweedish Fish (don't judge- there were 3 of us). The decorating is the best part but i like to dip things in chocolate and after the fortune fail began dipping pretzels which was fabulous- I love sweet and salty, it's down right addictive.

Homemade Fortune Cookies
(adapted from Cooking Light and www.ourbestbites.com)

1/2 C flour- If you have bread flour, use it.
1/2 C sugar
1/2 tsp almond extract
1/2 tsp vanilla extract
2 egg whites

Place all ingredients in a food processor and blend to combine. Place in a container and chill 1 hour.

Preheat oven to 400°.Cover a baking sheet with parchment paper*. Draw 3-4 (3-inch) circles on paper. Turn paper over (If you don't the pencil will be on your cookie). Spoon 1 teaspoon batter into center of each of the drawn circles; spread evenly to fill circle.

Bake at 400° for 5-6 minutes or until the cookies are brown just around the edges and a little toward the centers. Remove from the oven. Let sit for a few seconds before removing from pan. Working quickly, loosen edges of cookies with a spatula, and turn over

Place fortune along the center of 1 cookie. Fold cookie over so the edges meet ; press edges together. Gently pull the ends of the cookie down over the rim of a small bowl (or jar); hold for a few seconds or until set. Repeat procedure with remaining cookies. Makes about 24 cookies.

For some really fun dip them in melted chocolate and add sprinkles!

Thursday, February 11, 2010

Thank You Sweet Amandine

Sweet Amandine, my favorite baking blog!! LOVE IT.
They have so many wonderful recipes that will warm you up on a blissful day!
Last Sunday Amy, Jess and I decided to have our little baking day. We decided we were due for a good girls day, and what better way to celebrate a friendship is with baking!!!

Jess found this delicious recipe for Salted Chocolate Almond Toffee. It was fabulous. And it was actually super, super easy!! I highly recommend it to all of you. The only problem is that it is super addicting. I actually finished my piece for breakfast. HA

Get ready, set, BAKE.....
Salted Chocolate Almond Toffee (Sweet Amandine)

2 c. sliced almonds

1¾ c. sugar

3 T. water

½ c. unsalted butter

1 t. Blackstrap or other dark molasses

¼ t. sea salt, plus another 2-3 generous pinches for finishing

1 t. vanilla extract

¼ t. baking soda

5 oz. bittersweet chocolate, coarsely chopped

Preheat the oven to 350 degrees. Spread the almonds evenly on a baking sheet and toast until golden brown, 7 to 10 minutes. Let cool completely.

Line a baking sheet with parchment paper or a nonstick liner, and evenly spread half of the almonds on top. There should be no visible parchment paper between the almonds. Reserve the remaining almonds for topping.

Combine the sugar, water, butter, molasses, and salt in a medium, heavy saucepan. Place over medium heat and cook, stirring occasionally, until the mixture registers 295 degrees – no more, no less – on a candy thermometer. Depending on your heat and your pot, it will take anywhere from 5 to 10 minutes. Immediately remove the pot from the heat and stir in the vanilla and baking soda. Stir well, until fully incorporated. The mixture will bubble up when you add the baking soda, so take care.

Pour the hot mixture evenly over the almonds. Work quickly, as it will begin setting up immediately. If necessary, use a lightly-oiled rubber spatula to spread the toffee. When the toffee is just cool enough to touch, spread the chopped chocolate over top. As the chocolate melts from the warmth, use a spatula to spread it across the toffee. Sprinkle the rest of the almonds, and then a couple of pinches of sea salt over the chocolate to finish. Let cool completely. (I’ve been known to speed things up by sliding the pan into the refrigerator.)

Break the cooled sheet into pieces. The toffee will keep in an airtight container in a cool, dry place for several weeks. Do not freeze.

Yield: About 1½ pounds.

Saturday, January 23, 2010

Girls Night!!!


Tonight is our infamous girls night. Seriously I love girls night . I love the idea of going out with my ladies and not having to impress a boy ( or maybe to impress the waiter :)) My girls are the type that are always there for you no matter what. Seriously I think these girls know me better then I actually know myself.

Tonight= little black dress, tights, heels, wine and brownies. I love getting dressed up for the girls. Tonight though is a very special night. My best friend/ roommate from college got engaged a few weeks ago and we are CELEBRATING!!

So I of course made brownies. Now these are not the typical chocolate brownies that everyone is used to. These are Blonde Brownies with Cranberries and White Chocolate Chips. Seriously the best brownies ever. And not only are they the best brownies ever, but the brownie mix is highly addictive. You always know when you have a good recipe if the mix is yummy. This recipe is complements of my beautiful friend Brittany Orcutt!!!

Blonde Brownies with Cranberries and White Chocolate-350 degrees

½ c margarine

2c packed brown sugar

2 eggs

1 ½ c flour

2 tsp baking powder

¾ tsp salt

1 tsp vanilla

½ c dried cranberries

½ c white chocolate chips

Heat oven 350. Beat margarine and sugar. Add eggs and vanilla, beat till smooth. Add dry ingredients. Add cranberries and white chocolate chips. Spread into a greased 9X13 pan. Bake for 25-30 minutes. Do not over bake. When cooled Drizzle with glaze (powder sugar and milk).


Note: It is very hard to get out of the pan, even if you sprayed it! So since mine looks atrocious a fellow blogger/friend and I dipped them into chocolate. Just melt chocolate and dip'em!!

Wednesday, January 20, 2010

Best Chocolate Chip Cookies Ever! (Seriously!)


There is one food I have been making for years and years, literally, and that's chocolate chip cookies. It started in ninth grade home ec when my teacher Mrs. I had us make homemade chocolate chip cookies. I adore chocolate chip cookies and they are on of my favorite guilty pleasures- No matter how dreary the day chocolate chip cookies just seem to make everything better. For years and years I had always used the recipe off of the back of the Toll House bag. It was decent enough and I always got great reviews when I made the cookies for others. Then in a moment of sheer culinary delight I found Michelle, the Brown Eyed Bakers, chocolate chip cookie recipe on her site.

I am super picky about my chocolate chip cookies, I like them chewy but thick and heavy and a little crusty on the edges. Before this recipe my favorite chocolate chip cookie was the Triple Chocolate Chunk Cookie at Starbucks, I'd rate my consumption level in the hundreds, though I always felt a little disdain towards the milk chocolate chips in there- they just didn't belong. After making Michelle's recipe I can say with 100% certainty that I will not be buying my cookies at Starbucks I will be making them myself. I have a dozen of these cookies at home that I'm getting ready to send out and I'm making another batch tonight. Yes, these are that good.

Thick and Chewy Chocolate Chip Cookies
(Source: Baking Illustrated, page 434 via www.thebrowneyedbaker.com)

Makes about 18 large cookies.

These cookies are absolutely fabulous. Michelle advises that you weigh your ingredients which I do as I got a kitchen scale for Christmas, but even if you don't have a scale don't let that scare you away. Measured or weighed these cookies are fabulous.

2 cups plus 2 tablespoons (10 5/8 ounces) all-purpose flour
1/2 teaspoon baking soda
1/2 teaspoon salt
12 tablespoons (1 1/2 sticks) unsalted butter, melted and cooled until warm
1 cup packed (7 ounces) light or dark brown sugar
1/2 cup (3 1/2 ounces) granulated sugar
1 large egg plus 1 egg yolk
2 teaspoons vanilla extract
1-1 1/2 cups semisweet chocolate chips

1. Adjust the oven racks to the upper- and lower-middle positions and heat the oven to 325 degrees. Line 2 large baking sheets or spray them with nonstick cooking spray. (The rack positioning is weird I know- but trust me here and do it).

2. Whisk the flour, baking soda, and salt together in a medium bowl; set aside.

3. Mix the butter and sugars until thoroughly blended. Beat in the egg, yolk, and vanilla until combined. Add the dry ingredients and beat at low speed just until combined. Stir in the chips to taste.

4. Roll a scant 1/4 cup of the dough into a ball. Hold the dough ball with the fingertips of both hands and pull into 2 equal halves. Rotate the halves 90 degrees and, with jagged surfaces facing up, join the halves together at their base, again forming a single ball, being careful not to smooth the dough’s uneven surface. Place the formed dough balls on the prepared baking sheets, jagged surface up, spacing them 2 1/2 inches apart.

5. Bake until the cookies are light golden grown and the outer edges start to harden yet the centers are still soft and puffy, 15 to 18 minutes, rotating the baking sheets front to back and top to bottom halfway through the baking time. Cool the cookies on the sheets. Remove the cooled cookies from the baking sheets with a spatula.

Enjoy!

-Jessica

Monday, January 18, 2010

Spinach, Ricotta, Lasagna, OH MY

If cooking were a guy this could be the best love affair I have ever been in.
Now granted I am not a fabulous cook, actually I don't cook a whole lot.
But when I do, it is pretty awesome. I get the joy out of making a whole new creation.
I love being in the kitchen, just me, the ingredients and Darius Rucker, or Brad Paisley or the Glee soundtrack (or whatever else I am in the mood for).

So last night I decided to embark on an adventure: making Lasagna Roll-Ups. I made them for a family friend who was going through some difficulties.
Even if you suck at cooking, bowling hot water, etc, then this recipe is for you. SUPER EASY. But sorry you actually do have to know how to boil water for this one.


Vegetable Lasagna Roll-Ups

10 oz of chopped spinach (I like the spinach that comes in the can)
1c. part-skim ricotta
2 tbsp basil
1 egg
lasagna noodles
Marinara sauce
1/2 c. shredded mozzarella
1/4c grated Parmesan

Mix spinach with ricotta, basil, eggs. Spoon onto 8 cooed lasagna noodles.
Roll the Lasagna noodles up.
Place in a baking dish. Tops with 3c. marinara sauce, 1/2 c shredded mozzarella and 1/4 c. grated Parmesan.

Bake 45 minutes or until brown on top in 375 F.

Serves 4, Calories per serving 396


Options: Add Zucchini, Squash and other veggies you love

Recipe was taking from Good House Keeping :)

Sunday, January 10, 2010

Thank you Brad Paisley

As much as I was determined from keeping this blog just a bakers blog, I have another recipe for cookies. DON'T JUDGE!!
Today I decided to mix two of my loves together; Brad Paisley and Baking (one day soon, maybe I'll add Johnny Depp to that mixture).


Blueberry Thumbprint Cookies.
Simple really:
1. Make plain of sugar cookies
2. Roll into tiny balls
3. Use your finger and make an indention in the middle of the ball
4. Add 1/4 tsp to the indention

Bake at 350 for 10 minutes.

Optional: melt 1c of white chocolate chips and drizzle over the cooled cookies.

So as I sat here baking to Brad Paisley crooning love songs, I decided I needed kids and a husband to bake for. Sadly both Johnny Depp and Brad Paisley are taken. Oh well :)

Saturday, January 2, 2010

Wearing the Apron


Tomorrow I am hosting my first cookie exchange. Maybe it will be an annual thing, we'll see how tomorrow goes. What do we do at cookie exchanges? I have no idea. When I was talking to my sister a few months ago she mentioned she was going to one, I had already begun to plot. I decided to have one tomorrow.
I asked all of my girl friends to bring 2 Dozen cookies in which we will eat and pass out the recipes. I will then bag up cookies to send home with the girls.
This is a time to eat, celebrate a new year, and enjoy each others company.

Monster Cookies were on my list this year to make. Compliments of my Uncle Ray and The Food Network

Monster Cookies (Christmas)

Ingredients

3 eggs

1 1/4 cups packed light brown sugar

1 cup granulated sugar

1/2 teaspoon salt

1/2 teaspoon vanilla extract

1 12-ounce jar creamy peanut butter

1 stick butter, softened

1/2 cup multi-colored chocolate candies

1/2 cup chocolate chips

1/4 cup raisins, optional

2 teaspoons baking soda

4 1/2 cups quick-cooking oatmeal (not instant)

Directions

Preheat the oven to 350 degrees F. Line cookie sheets with parchment paper or nonstick baking mats.

In a very large mixing bowl, combine the eggs and sugars. Mix well. Add the salt, vanilla, peanut butter, and butter. Mix well. Stir in the chocolate candies, chocolate chips, raisins, if using, baking soda, and oatmeal. Drop by tablespoons 2 inches apart onto the prepared cookie sheets.

Bake for 8 to 10 minutes. Do not overbake. Let stand for about 3 minutes before transferring to wire racks to cool. When cool, store in large resealable plastic bags.

Monday, December 21, 2009

Oh My, My, Chocolate Macaroons!


Sometimes I can be stubborn, ridiculously stubborn if we're being completely honest here (and here we are always honest, promise). And sometimes with that stubbornness comes an irrational sense of determination, I'll let you decided whether that's good or bad, hehe. Like the time in high school when I decided to bake over 1,000 cookies to make the most delicious holiday gift bags for practically everyone I knew. Or the time when I decided to drive to BGSU in the middle of the night just to prove a point. Did I mention that I was kinda stubborn?


And maybe a little bit spontaneous too. Sometimes I just get an idea and flow with it. Like the time I decided to fly to Vegas spur of the moment to see my favorite Auntie and go to a Kenny Chesney concert with her. Sometime this stubbornness thing or even the spontaneousness can causes problems and it may have gotten me it trouble a few times, just maybe, but occasionally I am rewarded by my intense stubbornness and/or spontaeousness. Making Chocolate Macaroons was definitely a reward, a big reward, it may even make up for some of the not so rewarding problems that my stubbornness has caused.

I don't really know why, but Saturday morning I decided to make Macaroons. It was one of those hey- I'm gonna do this moments. I don't think I've even eaten a macaroon before, trust me if I had I would remember and probable be the size of a small elephant due to macaroon consumption (no lies here people, I told you we tell the truth). Coconut goodness and chocolate, how can you say no? I sure couldn't. The crisp golden coconut dipped in a luscious chocolate ganache. I'm telling you this stuff is better than crack (okay, so I can't verify that but it's good)! The macaroons come together easily and you are greatly rewarded- crisp on the outside, soft and chewy on the inside and that ganache- oh wow. Wow.

Be stubborn people, be stubborn. Go to the store right now- buy some coconut, preheat the oven and pretend you're somewhere tropical and enjoy these little guys. You really wanna listen here, Or I may be forced to drive to your house and feed you macaroons 'til you know you love them, I really am that stubborn.

Chocolate Macaroons
Adapted from TheBrownEyedBaker.com and JoyofBaking.com

If you know me, you know that I had an odd addiction to ganache- if I can replace chocolate with a chocolate ganache I do, which is what I did here and I was very pleased with the results. My macaroons ended up a little on the large side so next time I will make them smaller, but overall amazing. Make sure you use parchment paper or spray the pan with cooking spray- you can't cheat and use aluminum foil- otherwise you will be prying broken macaroons off your cookie sheet and picking off pieces of foil. True story.


2/3 cup sweetened condensed milk
1 large egg white
1½ teaspoons vanilla
1/8 teaspoon salt
3½ cups sweetened flaked coconut
3/4 cups heavy cream
2 Tbsp unsalted butter
8 oz semi-sweet chocolate

Preheat oven to 325 and in large bowl combine sweetened condensed milk, egg, vanilla and salt. Add coconut and stir until coated in the condensed milk mixture. Line a cookie sheet with parchment paper and drop macaroons into Tablespoon sized piles. Form into haystack like mounds (wet your fingers or the coconut will stick horribly). Bake for 15-20 minutes or until coconut is lightly browned on top.

Place chocolate in a small heat proof bowl. Heat cream and butter in a small saucepan until it is just ready to boil. Pour cream mixture over chocolate and let sit for 5 minutes. After time has passed whisk cream and chocolate together until smooth.

Working quickly dip each macaroon in the ganache and place on a cookie sheet lined with wax paper. Once all macaroons are dunked place in fridge for about 30 minutes to harden.

You can put the extra ganache in the fridge overnight and roll into mishapped balls to form truffles, I prefer mine plain but you can also roll them in cocoa powder.

Tuesday, December 8, 2009

Yes, I am 23 and still love Harry Potter

For all you Harry Potter lovers, do I have a recipe for you. Its quite simple really, BUTTER BEER!
The Three Broomsticks is the well known beloved pub where Harry, Hermione and Ron frequent in Hogsmeade. Have you ever wondered what butter beer tastes like. I have. I have pictured myself sitting in Three Broomsticks sipping a warm, butterscotch, rum flavored drink. Sadly we made our butter beer cold but it was still delicious!

Here's what you need:
1c Butter scotch schnapps
1 liter of A&W Cream soda

Be forewarned friends, this is a highly delicious drink and you will go through it fast. So enjoy and Merry Christmas.

Friday, December 4, 2009

Chocolate Sheetcake and Confessions

I have to make a confession to you- a big, ugly, dark secret- I don't have ANY Christmas spirit. Yes I said it- I am devoid of Christmas spirit and I just don't know why. Right now I have the Christmas Music blaring hoping, craving, wishing for some inspiration but nothing. All I can think of just how cold it got so quickly. And how icky the weather is- like a bad day of fall that just won't end but without all the wonderful pumpkins, apples and corn. Maybe its because I just got back from Vegas this week and the weather was so warm and delightful. It felt like the beginning of fall or an early summer day. Intense sunshine and nights full of city lights.

Don't be too worried though friends- I'm sure I'll get it back. Me and Christmas- we have a thing going. A serious thing, I might add, normally by Dec 1 the house is decked out, the tree is up and I'm listening to Christmas Music and sipping cocoa in my favorite turtle neck by the fireplace enjoying every last bit of holiday cheer. Last year I put up two Christmas Trees- two! Okay so they were both under three feet (one three foot, the other barely a foot) but it still counts. And this year I haven't put even one tree up- Its very sad.

But tonight I plan to rectify that. I will be decorating my tree, the house and putting up the outdoor lights. Take that lack of holiday spirit- I will beat you, yes indeed! Tonight I will be doing the Jingle Bell Rock around my Christmas Tree stringing lights and hanging ornaments. And in an attempt to get into the spirit and provide my brothers new church with some delicious (and specifically requested) cake I will also be making my Great Grandma Garrett's Chocolate Cake and let me tell you it is delicious! Its a moist sheet cake with hints of cinnamon and lots of chocolate, topped off with a chocolate icing. Its a family favorite and every since I got the recipe from my grandma last year it has been a staple at family gatherings. It pairs perfectly with a cup of coffee or a glass of milk as my mother prefers. Either way its sure to delight and is the perfect to munch on by the fireplace as you finish putting up the Christmas Tree.

I can already feel the Holiday Spirit!

Grandma Garrett's Chocolate Sheet Cake

For Cake:
  • 2 c flour
  • 2 cup sugar
  • 1/2 tsp salt
  • 1 c water
  • 3/4 c vegetable oil
  • 4 Tbsp dutch processed cocoa
  • 1/2 c buttermilk
  • 2 eggs
  • 1 tsp vanilla extract
  • 1 tsp baking soda
  • 1 tsp cinnamon

For Icing

  • 4 Tbsp dutch processed cocoa
  • 1 stick unsalted butter
  • 6 Tbsp heavy cream
  • 1/2 pound (or half a bag) powder sugar

Preheat over to 350 and spray a jelly roll sheet cake pan with cooking spray. Combine flour, sugar and salt in a large bowl. In a medium saucepan over medium high heat add cocoa, vegetable oil and water. Bring to a boil then remove from heat. Add Flour mixture, stirring well to incorporate. Add buttermilk, eggs, vanilla, baking soda and cinnamon stirring well to combine. Mixture will seem runny but don't worry. Pour batter onto prepared jelly roll pan and bake for 20 minutes.

While cake is baking prepare ingredients to make icing. Melt butter, cocoa and cream together in pan over medium-low heat. Once melted add powdered sugar and whisk until combined well. Keep pan over warm stove to make this easier. Pour warm icing over hot cake.

Tuesday, December 1, 2009

So we are not all addicted to sugar...

So far every single post is about sugar, chocolate or more sugar. Not that I have anything against sugar, but honestly we all need to eat some vegetables once in awhile. So here you go the perfect vegetable dinner.

Here is one recipe that I have made quite frequently and it is super easy. Vegetarian Stuffed


VEGETARIAN STUFFED PEPPERS (why is there a yellow box around the recipe? I have no idea!)

2 cloves garlic

1 c. shredded zucchini

1/4 c. parsley, chopped

1/2 c. onions, chopped

Fresh herbs (I like oregano, basil and chives, but add whatever herbs you like!!)

Saute the above in a small amount of olive oil. Then mix in a bowl the following: 1 c. feta cheese 1 c. grated Parmesan cheese 1 egg Sm. amount of bread crumbs

Stir in zucchini mixture. Stuff 4 peppers (red and green). Bake at 325 degrees for 1 hour. Add 2 tablespoons vinegar to pan drippings and pour over peppers. Serves 2-4.


A few tips:

1. It is so much cheaper not to actually buy oregano, basil, chives and garlic. Instead look for the brand Gourmet Gardens. It is usually in the fruit,vegetable, and herb aisle . Gourmet Gardens has tubes of different herbs. I like to buy those because they last longer then fresh ones and taste exactly the same.

2. It doesn't matter whether you buy red or green peppers, just choose whichever colors you like. I prefer green!

3. Also I tend to double the ingredients. That way most of the peppers have equal the amount of ingredients.

4. I like to cook brown rice for a side dish. If you have another idea for a side dish then please comment!!

5. ENJOY!!

Friday, November 20, 2009

A Cookie Break Between Packing, Exams and New Moon T-Shirts

Life has been crazy. Not that my life isn't always crazy- because it is. It just feels like things have been extra crazy lately. Taking exams early, packing for Vegas, skipping class to pack, making Twilight T-shirts. Ya Know. Crazy.

But no matter how crazy my life gets there will always be a few constants and baking is one of those. I was sick all week- the dreary I need to pee but the effort required to walk the 10 feet to the bathroom is to much so i'll hold in kind of sickness. Although there was some Gilmore Girls incorporated in which is why I don't mind getting sick, weird- i know. But by Thursday I saw the light at the end of tunnel and I actually left my house for the first time in like 3 days- which with the craziness my life involves is amazing that i didn't go anywhere. Truly, it was.

So by Thursday there was class, more sleeping and of course Gilmore Girls. Oh and orders not to go to class- The Vegetarian maintained that I needed to save my strength for New Moon. Valid point, besides that's what friends are for- get better cuz I'm dragging your ass to see this movie. :) Love it. But a miraculous thing occurred- I got my energy back and after throwing myself a fiesta for dinner I decided to bake.

Lets be honest and say at that point I wasn't up for much but I did manage to whip up a batch of No-Bake Cookie. And let me say these cookies were delic! They reminded me of the ones my Aunt Karen used to make. I would go down to visit her with my grandma and me and my sister would have burping contest with my cousins and she would make us cookies and play video games with us when the boys weren't there. Having typed that- Wow. What a woman to put up with all that- I sounded like tom-boy terror. haha. I was.

But Aunt Karen's cookies were always the best. I never did get the recipe, at that point i was to preoccupied playing with the boys but these cookies are incredible. Much thanks to the Brown Eyed Baker for posting these! These come together super quick and are very easy. But lack of work does not result in lack of taste. If you have 10-15 minutes to spare and a choclate craving these are the cookies for you! I halves the recipe when I made it and it yielded a dozen large cookies but this recipe doubles or even triples easily.

No-Bake Cookies

1/4 cup (1/2 stick) butter
1 cups granulated sugar
1/4 cup milk
2 tablespoons cocoa powder
1/4 cup peanut butter
1 teaspoons vanilla extract
1 1/2 cups quick-cooking oats

Add the butter, sugar, milk and cocoa powder to a 4-quart saucepan and bring to a roling boil for 1 minute. Remove pan from heat and add the peanut butter and vanilla, stiring until smooth. Then stir in the oats. Form into cookie shapes on a cookie sheet and let set. Then enjoy!

Monday, November 9, 2009

S'mores Bars- Yum Yum!

S'mores Bars. Amazing. Right now as I type this I am eating the very last one and thinking to myself that I should stop by the store on my way home tonight and make another batch. They're that good. And I mean good. Plus they are super quick to put together- always a plus in my book. Easy and delicious- I dare you to say no.

I originally found the recipe on JoytheBaker's blog but her recipe called for 3 sticks of butter and corn syrup!!! I wouldn't call my self super healthy but in an effort to keep my pants fitting and to look good while in Vegas I decided to change the recipe up. No offense Joy but you must have a metabolism like my friend Eric- the kid is like 6'2, 160 pounds and you can see every stinkin rib- he kinda reminds me of a Holocaust survivor except this kid is constantly eating. Needless to say I'm extremely jealous but i digress.

Any ways- I decided to make a chocolate ganache and add a little bit extra butter to get in to a runny consistency to coat the graham crackers, but i must say I that I love, love, LOVE a good ganache so i prolly made this adaptation out of pure selfishness and maybe out of lack of corn syrup. haha. Did I mention how much I love a good ganache?

But seriously- make these- according to the small group they are the second best thing i've ever made, and trust me that says alot.

S'mores Bars

adapted from Joythebaker.com


1 stick unsalted butter
3/4 c heavy cream
8 oz semi-sweet chocolate chips (or chopped pieces)
12 oz graham crackers
2 handfulls of mini marshmellows, plus a few

Liberally grease a 13x9 pan and set aside. Combine butter and cream in sauce pan and slowly bring to a boil over medium heat. Place chocolate chips in a heat proof bowl and set aside. Once butter and cream are combined and being to boil pour the mixture directly over the chocolate. Let sit for 5 minutes and then whip until smooth.

Break graham crackers into pieces into large bowl. Add marshmellows and pour chocolate mixture over top, mixing until chocolate has saturated graham crackers and marshmellows. Scrape into 13x9 pan and sprinkle few extra marshmellows on top. Press down with spatula (like you do with rice crispies). Refrigerate 2 hours or until solid and enjoy!

Thursday, November 5, 2009

Oreo Pudding and The Travesty of Being With Out Butter

Today I had to take a stats exam which was très mauvais. Upon finishing and rushing home I decided I need to bake. Running was out of the question as I hadn't stretched very well after my run last night and was très sore. But upon opening the fridge and waiting for a moment of divine inspiration- which was chocolate peanut butter no bake cookies, I realized I had one insurmountable obstacle- I was out of butter.

I know what you're thinking- out of butter- that's your travesty and yes it is. I had planned some lovely cookies for you with lots of colorful pictures and enough left over to wrap up and take to work with you. It would have been grand.

So in an effort to inundate you with more post and provide you with a euphoric concoction to make this weekend I open up my recipe binder and stumbles upon one of my favorite desserts- Oreo Pudding. I came across the recipe years ago in the most awkward way. I was at a cookout with some friends of my parents friends down in Tennessee. I don't really remember much about what we ate or how the evening went (other than that i ran through a screen door- it was dark okay?) but I do remember the pudding. It was delightful. It was like a symphony of flavor in mouth the Oreo's the smoothness of the pudding. I was hooked and I asked for the recipe right then.

So without further ado-

Oreo Pudding

1 box Oreo Cookies
1 small box vanilla pudding
1 large container of cool whip
1 8oz cream cheese

Mix pudding according to directions on box. Mix in cool whip and cream cheese. Crumble 3/4 of Oreo's and fold into pudding mixture. Place remaining cookies on top. Refrigerate for 2 hours and serve.

Friday, October 23, 2009

Apple Butter and the Arrival of Fall

Sorry for the lapse in posts. We got a great start and then nothing... You must have thought the oven broke. But fear not. Posts are coming. I've got a couple of great ones lined up for you and Apple Butter is just the begining. You're gonna be licking your fingers wanting more, at least I hope you will...


So in the spirit of fall and my Dad's upcoming birthday I decided to attempt making apple butter. So I called up the girls we gather as many jars, pots, and apples as we could find. And so the adventure began. Good thing we had some left over cake to munch on because you should not try and use your great-grandmothers oversized pot to process your jars- no matter how many hours you wait- it will not boil. Haha.


Apple Butter

Adapted from 101 Cookbooks


This recipe makes roughly 40 ounces of apple butter. We made 5 small 8-ounce jars (which I think were the perfect size) or you could make a couple large sized jars, it's up to you.


  • 4 pounds of apples, peeled and cut into bite sized chunks (we used Gala, and Fuji apples)

  • 1/2 gallon of apple cider

  • 2 cups of sugar (I typically use about a 1/2 cup of sugar for every pound of fruit)

  • 1 1/2 t. cinnamon

  • 1/2 t. cloves

  • Juice of one lemon


Prepare the jars: Heat oven to 225 and place jars (but not bands or lids) on the baking racks. Jars will need to stay in the oven for at least 20 minutes. Boil the bands (not lids) with in hot water and let them dry completely on a clean towel. Use new lids.


Make the apple butter: In a big, heavy pot over medium/med-high heat add the apples and enough apple cider to just cover the apples. Bring to a simmer. A bit of a foam will form, you want to skim that off a couple of times (don't obsess). Cook the apples until they are tender and soft, roughly 20-30 minutes. Next puree apples in a blender (or use an immersion blender, thats what we did). If you use a blender make sure to do it in small batches (don't fill the blender over half full with the hot liquid- it expands). The puree will be thin- don't worry.


Put the puree back in the big pot over medium heat and bring to a simmer. Then, while stirring, slowly sprinkle in the sugar, cinnamon, cloves, and lemon juice. Continue to simmer over medium/med-low heat. It takes quite a while from this point until the apple butter reduces and really thickens up, (It took us about an hour). Make sure you stir regularly, you don't want it to burn or cook to the bottom of the pot. You are looking for the apple butter to thicken up and darken. Towards the end it gets a bit messy, the simmer becoming more lava-like - it also sounds different, lots of plop and slop noises and lots of spattering coming from the pot. (Very painful polps if they hit your skin.) Remove from heat.


While the apple puree is cooking fill your your biggest, deepest pot with water and bring to a rolling boil. The water level will need to cover the jars.


Fill the jars:Using tongs carefully remove each jar from the oven and fill to within 1/4 inch of the top with the apple puree. Wipe off rims with a clean dry paper towel. Place a dry lid and band on each jar and lightly tighten. Using tongs place each of the jars in the boiling water and boil for 10 minutes. Turn off heat and let jars sit in water for about a minute and then remove. Check to make sure lid has popped down, if not you may process again within 24 hours. Let jars sit for 24 hours then store in a cool dark place.

Sunday, September 27, 2009

All-Purpose Flour (Or basic information about us)

We are three young ladies- A college graduate, an almost graduate, and one who we fear will never graduate- she spends too much time baking. We come from the suburbs, have spent time in the city and spend far too much time in our kitchens. We all are headed in different directions in our life- on to different cities and different parts of the world, but one things unites us- our desire to create euphoric concoctions (and make all of our friends gain at least ten pounds.) This is our journey and we invite your to join us, to cook along side us and guide us as we explore different foods and different recipes.

If you are a vegetarian, a baker or a chocolate maker please send us your recipes and your thoughts. We would love to hear from you.